
This is the 11th and final lesson in my tutorial describing how to make a sterling silver wire wrapped bracelet.
Finish the Bracelet
Now that your sterling silver wire is cut into pieces, and you have one wrapped bead to start, you're ready to wrap all the beads and finish off the bracelet. This last post in the tutorial tells you how.
Linking the wrapped beads together
Once you have a wrapped bead, you can begin to link it to other beads and the clasp.
Start a new bead wrap by starting to make a perfect wrapped loop. If you forgot how, here's the lesson once again.
Before you wrap the wire around the stem, slip the loop into one of the loops created in your first wrapped bead. With the loops linked together, hold the new loop with your flat nose pliers.
Then wrap your new loop carefully and finish it off as instructed in the earlier instructions on finishing the loop. When finishing, be careful not to distort the original loop.
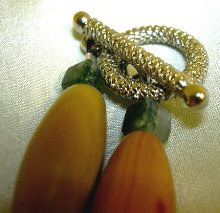
Attach a bead and form the opposite loop. Before you wrap that loop, slip the end of the wire into the loop of one end of the toggle clasp. Then wrap it carefully and finish it off.
You should now have two linked beads, making a beaded chain, with a toggle clasp at one end.
Continue to link wrapped beads to the chain.
When you have formed your last loop, do not finish it off right away. First, slip the end of the wire into the loop of the other end of the toggle clasp. Then wrap it carefully and finish it off.
And finally....You're done! You made it through the last lesson! It wasn't easy, but you did it, and you can be proud. You now have a beautiful, secure, and professional-looking sterling silver bracelet that you wire wrapped yourself - and made from start to finish!
Note: The blog owner may be compensated for the content of this article. See the full disclosure statement regarding compensation in compliance with FTC guidelines.
















No comments:
Post a Comment