Seat of Your Pants Method
You can simply cut a lot of pieces of wire, then start making the bracelet, and stop when you're done. I do this a lot. It's simplest.
The disadvantage is that in the beginning, you will almost certainly end up wasting precious sterling silver. There's a good chance your bracelet will be the wrong size for your wrist, too. That's no disaster. But it will mean adjustment and waste - or giving the bracelet to someone else as a gift!
Exact Method
Using basic arithmetic (don't be afraid if you're not a math person - this is really basic stuff), you can use a simple formula to end up with a perfectly fitting wire-wrapped bracelet.
There are 3 measurements you will need to know.
1) The length of the wrapped bead
This is the length you determined earlier. Let us pretend this is 18mm.
2) The bracelet length.
A standard-sized finished bracelet is 7 ½", or 187mm. You can also measure the length of an existing bracelet that you own, or measure around your wrist and add an inch to get the total bracelet length you desire.
3) The length of the fastened toggle clasp.
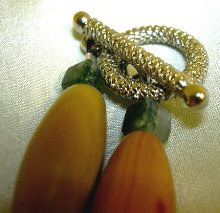
Close the clasp by slipping the bar into the ring and laying out the toggle so the looped ends are in a line. Measure from loop to loop in millimeters. Let us pretend this length comes to 26mm.
Quick Formula
Divide the finished length, minus the length of the fastened toggle clasp, by the length of the wrapped bead. Feel free to use a calculator.
Example
Length of finished bracelet 187mm
minus
Length of closed toggle clasp 26mm
divided by
Length of wrapped bead 18mm
187 minus 26 equals 161
161 divided by 18 equals 8.94.
8.94 is the number of wrapped beads you will need. Since beads are in whole numbers, round that up to 9.
So in this example you will need about 9 wrapped beads to make your bracelet.
The number of wrapped beads you will need is equal to the number of pieces of wire to cut.
Do your measurements and calculations as shown in the example. Once you know how long the sterling silver wire needs to be and how many pieces to cut, go ahead and cut your wire.
Next, you'll learn how to wrap all the beads together and finish off the bracelet.
Note: The blog owner may be compensated for the content of this article. See the full disclosure statement regarding compensation in compliance with FTC guidelines.




No comments:
Post a Comment